Classic Yellow Cake with Yogurt Cream and Berries

I was looking for a simplified recipe for a classic birthday cake that didn’t require three different bowls and beating egg whites. This recipe fit my criteria and was delicious. I cannot bring myself to put 1 1/2 cup of sugar in a single recipe so I reduced to 1 cup and no one missed that extra sugar.

Classic Yellow Cake with Yogurt Cream and Berries
Print Recipe
Servings
10 servings
Servings
10 servings
Classic Yellow Cake with Yogurt Cream and Berries
Print Recipe
Servings
10 servings
Servings
10 servings
Ingredients
Cake
Yogurt Cream Frosting
Adjust servings: servings
Units:
Instructions
  1. Arrange a rack in middle of oven; preheat to 350°F.
  2. Brush two 9 inch layer cake pans with butter. Line bottom of pans with parchment paper; brush again with butter.
  3. Whisk flour, baking powder, and salt in a medium bowl.
  4. Using an electric mixer on medium speed, beat granulated sugar and butter in a large bowl, scraping down sides as needed, until light and creamy, about 5 minutes. Add vanilla and yolks in 2 additions, scraping down bowl after each. Reduce mixer speed to low and add dry ingredients, alternating with milk mixture in 2 additions, beginning and ending with dry ingredients and beat just until smooth.
  5. Divide batter between prepared pans.
  6. Bake cakes until light golden brown and a tester inserted into the centers comes out with a few moist crumbs attached, 30–35 minutes.
  7. Let cool in pans at least 15 minutes. Invert cakes onto racks, peel off parchment, and let cool completely.
Cream Frosting
  1. Beat the whipping cream with a mixed until the beater starts making tracks. Slowly add the powdered sugar while continuing to beat, add vanilla and beat just until cream is stiff.
  2. Carefully fold in the Greek yogurt with a spatula.
  3. Spread the 1/3 of frosting on the first layer. Cover the layer with berries (strawberries, blueberries, raspberries, blackberries or a mix of berries).
  4. Place second layer, topside down. Spread remaining frosting on the top layer, letting it run down the sides. Place berries on top of the cake.
Share this Recipe

Carrot-Shape Sugar Cookies in Oreo “Dirt”

By request, this is the third year these cookies are part of my Easter menu; they’re becoming a family tradition.

The instructions seem long-winded and intimidating but don’t let the step-by-step instructions alarm you. They’re so worth it. Or recruit the kids and make it a family project; it will be fun!

I use India Tree food coloring (available on  Amazon) made from highly concentrated vegetable colorants; they contain no corn syrup or synthetic dyes.

What to do with all the leftover Oreo dirt?
I freeze it for another time; here is one of my favorite ways to use the Oreo crumbs
Epicurious: Frozen White Chocolate and Raspberry Mousse

I’m going to give this Grasshopper a try, it evokes happy childhood memories! Have you ever had Grasshopper Pie?

Simply Recipes: Grasshopper Pie

Carrot Shape Sugar Cookies in Oreo Dirt
Print Recipe
Carrot Shape Sugar Cookies in Oreo Dirt
Print Recipe
Ingredients
Adjust servings:
Units:
Instructions
  1. In a medium-sized bowl whisk together flours, baking powder, and salt. Set aside.
  2. In a large bowl cream, with electric beater (or by hand), butter and sugar together for several minutes. Add egg, milk, and vanilla until thoroughly combined.
  3. Add a few drops of yellow food coloring and one drop of red.
  4. Slowly add flour mixture until well mixed. Adjust food coloring one drop at a time until it has the desired orange shade.
  5. Turn off beater and shape dough into a ball.
  6. Divide in half; roll each half into a log on a silpat or floured surface. If the dough is too soft and sticky, refrigerate for 10 - 15 minutes. Don't let it get too cold or it will be difficult to shape.
  7. Cut into ½” slices
  8. Roll (either on the counter or between your palms) each slice into a cone shape
  9. Place on cookie sheet lined with parchment paper
  10. After cookie sheet is full, slightly flatten the “carrots”
  11. Refrigerate a couple of hours or overnight; they hold their shape better if they're really cold before baking
  12. Bake at 350 for 5 – 8 minutes (depending on the size of your “carrots) peeking to make sure the tips don’t get too dark. Cool
  13. Stick a toothpick in the top of each cookie, carefully pushing it almost all the way in. Make an assembly line. Tie a green ribbon on the tip of toothpick. I use fabric-with-wire ribbon because I can shape them.
  14. Grind Oreo cookies in a food processor or blender. Place the Oreo “dirt” in a serving dish.
  15. Dip bottom half of "carrot" cookie into Dulce de Leche and stick in the Oreo dirt.
Recipe Notes

NOTE: Make ahead so it’s not overwhelming. For example

  • 1 or 2 weeks earlier a) make and freeze the cookies to bake later or b) make AND bake the cookies. If making ahead; I freeze them (baked or unbaked it’s the same process) in a large ziploc bag lined with parchment paper. Place parchment paper between the layers or cookies also so they don’t stick together.
  • Make the Oreo crumbs by pulsing 6–8 cookies at a time in a blender or food processor. Store in a covered container.
  • One or two days before, tie green ribbon on toothpicks and insert into baked cookies. I like using fabric ribbons wire to hold the shape)
  • Day of: recruit your kids to dip the “carrots” in Dulce de Leche and place in Oreo “dirt"
Share this Recipe

Sausage Poblano Pepper Strata

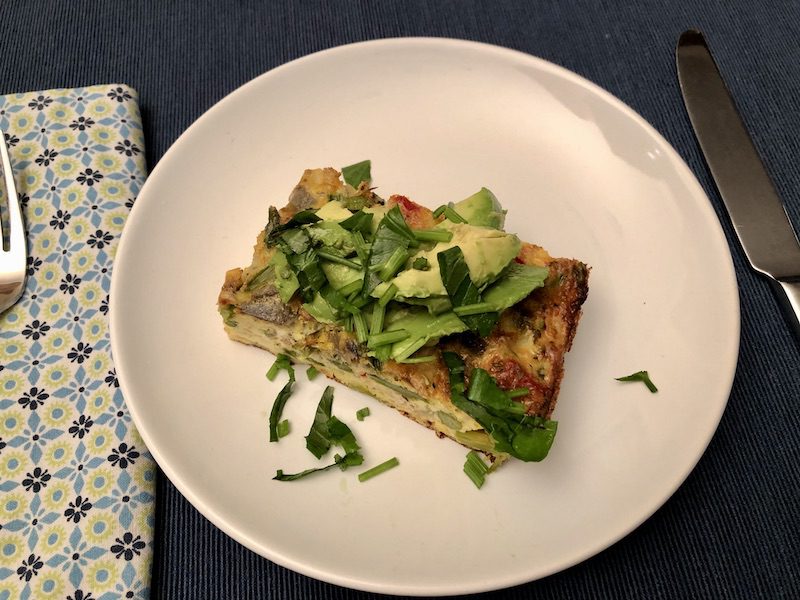
The name strata come from layers. Strata is a breakfast dish made from a beaten egg mixture poured over bread (sliced or cubed). There are innumerable variations, omnivore and vegetarian

  • different varieties of vegetables
  • breakfast meats (sausage, bacon, ham)
  • herbs and spices

I like stratas because you can make them the day before and chilled overnight. In the morning bake it in the oven.

Sausage Poblano Pepper Strata
Print Recipe
Servings
8 servings
Servings
8 servings
Sausage Poblano Pepper Strata
Print Recipe
Servings
8 servings
Servings
8 servings
Ingredients
Adjust servings: servings
Units:
Instructions
  1. Butter a 13 x 9-inch baking dish.
  2. Heat olive oil in large skillet over medium heat; add onion and sauté until translucent. Add sausage and chopped poblano pepper and cook stirring occasionally until sausage is cooked through. Remove from heat and cool.
  3. Cut twenty 1-inch slices from baguette and arrange in one layer in baking dish.
  4. Whisk eggs and milk; mix in cooked sausage and all remaining ingredients until blended.
  5. Pour egg mixture over bread. Cover and chill overnight.
  6. Preheat oven to 350°F. Bake strata uncovered until puffed and golden, about 40 - 45 minutes.
  7. Let stand 5 minutes before serving.
  8. Serve with sliced avocado, chopped cilantro and/or salsa
Share this Recipe

Baked Blueberry French Toast

My sister introduced me to this recipe years ago and it is a big family favorite.

It’s quick and easy to make the night before. In the morning toss the blueberries and pecans on top and bake in a pre-heated oven for 25 minutes.


Baked Blueberry French Toast
Print Recipe
Servings Prep Time
8 15 minutes
Cook Time
20 minutes
Servings Prep Time
8 15 minutes
Cook Time
20 minutes
Baked Blueberry French Toast
Print Recipe
Servings Prep Time
8 15 minutes
Cook Time
20 minutes
Servings Prep Time
8 15 minutes
Cook Time
20 minutes
Ingredients
For Blueberry Syrup
Adjust servings:
Units:
Instructions
French toast
  1. Butter a 13 x 9-inch baking dish.
  2. Cut twenty 1-inch slices from baguette and arrange in one layer in baking dish.
  3. In a large bowl whisk together eggs, milk, nutmeg, vanilla, and brown sugar. Pour evenly over bread.
  4. Chill mixture, covered, until all liquid is absorbed by bread, at least 8 hours, and up to 1 day.
  5. Preheat oven to 350°F.
  6. Sprinkle pecans and blueberries evenly over bread mixture and bake mixture 20 minutes, or until any liquid from blueberries is bubbling.
Syrup
  1. Make syrup while French toast is baking: In a small saucepan cook blueberries and maple syrup over moderate heat until berries burst, about 5 minutes.
  2. Pour syrup through a sieve into a heatproof pitcher, pressing on solids, and stir in lemon juice and zest.
  3. Syrup may be made 1 day ahead and chilled, covered. Reheat syrup before serving.
  4. Serve French toast with syrup.
Recipe Notes
Share this Recipe