Classic Yellow Cake with Yogurt Cream and Berries

I was looking for a simplified recipe for a classic birthday cake that didn’t require three different bowls and beating egg whites. This recipe fit my criteria and was delicious. I cannot bring myself to put 1 1/2 cup of sugar in a single recipe so I reduced to 1 cup and no one missed that extra sugar.

Classic Yellow Cake with Yogurt Cream and Berries
Print Recipe
Servings
10 servings
Servings
10 servings
Classic Yellow Cake with Yogurt Cream and Berries
Print Recipe
Servings
10 servings
Servings
10 servings
Ingredients
Cake
Yogurt Cream Frosting
Adjust servings: servings
Units:
Instructions
  1. Arrange a rack in middle of oven; preheat to 350°F.
  2. Brush two 9 inch layer cake pans with butter. Line bottom of pans with parchment paper; brush again with butter.
  3. Whisk flour, baking powder, and salt in a medium bowl.
  4. Using an electric mixer on medium speed, beat granulated sugar and butter in a large bowl, scraping down sides as needed, until light and creamy, about 5 minutes. Add vanilla and yolks in 2 additions, scraping down bowl after each. Reduce mixer speed to low and add dry ingredients, alternating with milk mixture in 2 additions, beginning and ending with dry ingredients and beat just until smooth.
  5. Divide batter between prepared pans.
  6. Bake cakes until light golden brown and a tester inserted into the centers comes out with a few moist crumbs attached, 30–35 minutes.
  7. Let cool in pans at least 15 minutes. Invert cakes onto racks, peel off parchment, and let cool completely.
Cream Frosting
  1. Beat the whipping cream with a mixed until the beater starts making tracks. Slowly add the powdered sugar while continuing to beat, add vanilla and beat just until cream is stiff.
  2. Carefully fold in the Greek yogurt with a spatula.
  3. Spread the 1/3 of frosting on the first layer. Cover the layer with berries (strawberries, blueberries, raspberries, blackberries or a mix of berries).
  4. Place second layer, topside down. Spread remaining frosting on the top layer, letting it run down the sides. Place berries on top of the cake.
Share this Recipe

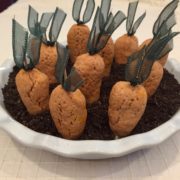
Carrot-Shape Sugar Cookies in Oreo “Dirt”

By request, this is the third year these cookies are part of my Easter menu; they’re becoming a family tradition.

The instructions seem long-winded and intimidating but don’t let the step-by-step instructions alarm you. They’re so worth it. Or recruit the kids and make it a family project; it will be fun!

I use India Tree food coloring (available on  Amazon) made from highly concentrated vegetable colorants; they contain no corn syrup or synthetic dyes.

What to do with all the leftover Oreo dirt?
I freeze it for another time; here is one of my favorite ways to use the Oreo crumbs
Epicurious: Frozen White Chocolate and Raspberry Mousse

I’m going to give this Grasshopper a try, it evokes happy childhood memories! Have you ever had Grasshopper Pie?

Simply Recipes: Grasshopper Pie

Carrot Shape Sugar Cookies in Oreo Dirt
Print Recipe
Carrot Shape Sugar Cookies in Oreo Dirt
Print Recipe
Ingredients
Adjust servings:
Units:
Instructions
  1. In a medium-sized bowl whisk together flours, baking powder, and salt. Set aside.
  2. In a large bowl cream, with electric beater (or by hand), butter and sugar together for several minutes. Add egg, milk, and vanilla until thoroughly combined.
  3. Add a few drops of yellow food coloring and one drop of red.
  4. Slowly add flour mixture until well mixed. Adjust food coloring one drop at a time until it has the desired orange shade.
  5. Turn off beater and shape dough into a ball.
  6. Divide in half; roll each half into a log on a silpat or floured surface. If the dough is too soft and sticky, refrigerate for 10 - 15 minutes. Don't let it get too cold or it will be difficult to shape.
  7. Cut into ½” slices
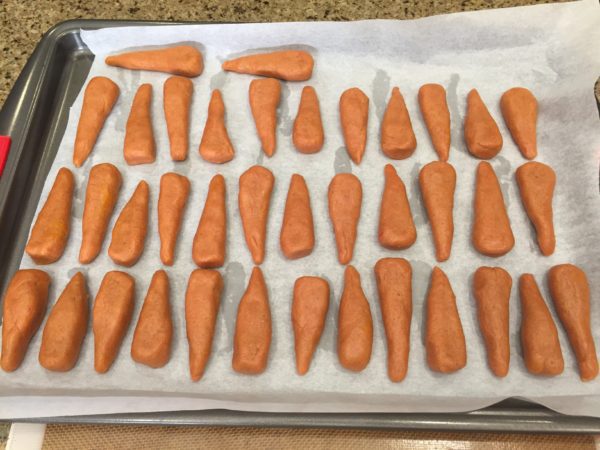
  8. Roll (either on the counter or between your palms) each slice into a cone shape
  9. Place on cookie sheet lined with parchment paper
  10. After cookie sheet is full, slightly flatten the “carrots”
  11. Refrigerate a couple of hours or overnight; they hold their shape better if they're really cold before baking
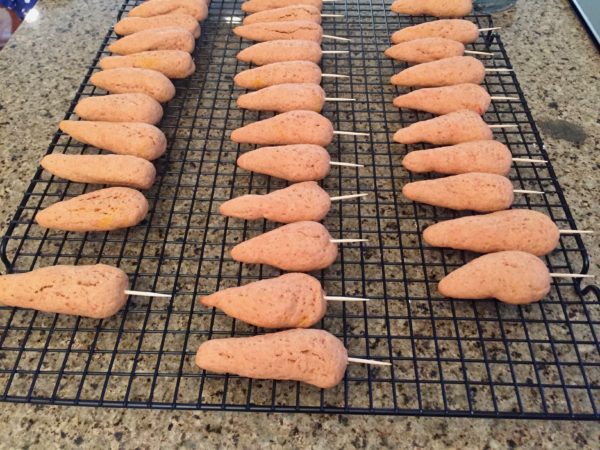
  12. Bake at 350 for 5 – 8 minutes (depending on the size of your “carrots) peeking to make sure the tips don’t get too dark. Cool
  13. Stick a toothpick in the top of each cookie, carefully pushing it almost all the way in. Make an assembly line. Tie a green ribbon on the tip of toothpick. I use fabric-with-wire ribbon because I can shape them.
  14. Grind Oreo cookies in a food processor or blender. Place the Oreo “dirt” in a serving dish.
  15. Dip bottom half of "carrot" cookie into Dulce de Leche and stick in the Oreo dirt.
Recipe Notes

NOTE: Make ahead so it’s not overwhelming. For example

  • 1 or 2 weeks earlier a) make and freeze the cookies to bake later or b) make AND bake the cookies. If making ahead; I freeze them (baked or unbaked it’s the same process) in a large ziploc bag lined with parchment paper. Place parchment paper between the layers or cookies also so they don’t stick together.
  • Make the Oreo crumbs by pulsing 6–8 cookies at a time in a blender or food processor. Store in a covered container.
  • One or two days before, tie green ribbon on toothpicks and insert into baked cookies. I like using fabric ribbons wire to hold the shape)
  • Day of: recruit your kids to dip the “carrots” in Dulce de Leche and place in Oreo “dirt"
Share this Recipe

Chocolate Coconut Macaroons

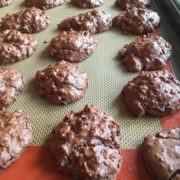
Absolutely spectacularly chocolaty, crispy on the outside, somewhat gooey-chewy inside. One of my all-time favorite cookie recipes. Gluten-free too.
Active Time: 10 min
Total Time: 50 minutes

Chocolate Coconut Macaroons
Print Recipe
Servings Prep Time
30 cookies 10 minutes
Cook Time
40 minutes
Servings Prep Time
30 cookies 10 minutes
Cook Time
40 minutes
Chocolate Coconut Macaroons
Print Recipe
Servings Prep Time
30 cookies 10 minutes
Cook Time
40 minutes
Servings Prep Time
30 cookies 10 minutes
Cook Time
40 minutes
Ingredients
Adjust servings: cookies
Units:
Instructions
  1. Preheat oven to 300°F. Line 2 large rimmed baking sheets with parchment paper.
  2. Place 1 cup chocolate chips in microwave-safe bowl; microwave on low setting at 30 second intervals, stirring occasionally, until chocolate is melted. Cool slightly.
  3. Using electric mixer beat egg whites and salt in medium bowl until soft peaks form. Gradually add sugar, then vanilla, beating until whites are thick and glossy.
  4. Fold in melted chocolate and coconut, then remaining 1/3 cup chocolate chips.
  5. Drop batter by heaping teaspoonfuls onto prepared sheets, spacing 1 1/2 inches apart.
  6. Bake cookies 10 minutes. Reverse sheets. Bake until tops are dry and cracked.
Recipe Notes
Share this Recipe

Mango Yogurt Mousse

Creamy, luscious, every bite is savored. It’s one of my favorite recipes for summer time dinner parties; it’s easy to double or triple the recipe and serve in acrylic cups. And I always get requests for the recipe.

Mango has a fascinating history and is rich in nutrients.

[su_expanding_quote_web alignment=”full” source_site=”Organic Facts” source_url=”https://www.organicfacts.net/health-benefits/fruit/mango.html” full_quote=”Mango originated in Burma and eastern India almost 4,000 years ago. Many stories in Indian mythology include the mention of the mango plant, and Lord Buddha is said to have often meditated in a mango grove. Mango cultivation first spread to Malaysia, eastern Asia and eastern Africa and was finally introduced to California around 1880. Mangoes were introduced to Africa and Brazil by Portuguese explorers, while mango cultivation started in Hawaii and Florida around the 19th century. They are an excellent source of dietary fiber and vitamin B6, as well as a good source of vitamin A and vitamin C. Mangoes are rich in minerals like potassium, magnesium and copper, and they are one of the best sources of quercetin, betacarotene, and astragalin. These powerful antioxidants have the power to neutralize free radicals throughout the body. Ailments like heart disease, premature aging, cancer and degenerative diseases are due to these free radicals that damage the cells.” short_quote=”Mangoes are rich in minerals like potassium, magnesium and copper, and they are one of the best sources of quercetin, betacarotene, and astragalin. These powerful antioxidants have the power to neutralize free radicals throughout the body”]
Mango Yogurt Mousse
Print Recipe
Servings
4 servings
Servings
4 servings
Mango Yogurt Mousse
Print Recipe
Servings
4 servings
Servings
4 servings
Ingredients
Adjust servings: servings
Units:
Instructions
  1. In a small saucepan sprinkle the gelatin over 1/4 cup cold water, let it soften for 1 minute, and heat the mixture over low heat, stirring, until the gelatin is dissolved.
  2. Peel, pit and cut mangoes into bite-size pieces.
  3. Place 2 cups of mango pieces in blender; add sugar, vanilla, and the gelatin mixture. Blend well. Reserve the remaining mango for later.
  4. Transfer the blended mixture to a bowl and stir in the yogurt.
  5. In a chilled bowl beat the cream until it holds stiff peaks, fold it into the mango mixture gently but thoroughly.
  6. Cover bowl and chill mousses for at least 4 hours or overnight.
Share this Recipe
 

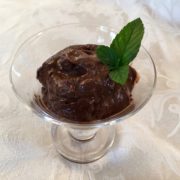
Raw Chocolate Mousse

There is tree in our garden in Cochabamba so friendly and perfect for climbing, that my daughter named him Sammy Tree when she was three and needed help climbing into its branches.

Sammy is an avocado tree and unbelievably fruitful! Last year, two branches broke under the weight of more than two hundred large avocados! With great love, my father propped the remaining fruit-laden branches up to avoid future breakage and pain to Sammy.

Seeking new ways to enjoy Sammy’s bounty, I found various recipes for avocado-based chocolate mousse. Who knew?!

So creamy and rich, it takes only a couple of spoonfuls to satisfy tummy and palate.

Raw Chocolate Mousse
Print Recipe
Servings Prep Time
8 servings 15 minutes
Servings Prep Time
8 servings 15 minutes
Raw Chocolate Mousse
Print Recipe
Servings Prep Time
8 servings 15 minutes
Servings Prep Time
8 servings 15 minutes
Ingredients
Adjust servings: servings
Units:
Instructions
  1. Place the flesh of the avocados in a food processor to purée.
  2. Add the banana and process until well blended.
  3. Add the rest of the other ingredients and blend again. Adjust sweetness to taste.
Share this Recipe

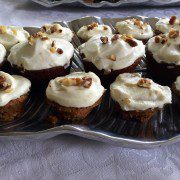
Carrot Cake Cupcakes

This is a delightful recipe from Cooking Classy. I modified it by adding fresh ginger, reduced the sugar and used coconut oil.

Rather than the Cream Cheese frosting from the original recipe, I made Whipped Orange Cream because I had heavy cream in my refrigerator.

But check out the original recipe with its marzipan carrots!

Carrot Cake Cupcakes
Print Recipe
Servings Prep Time
12 cupcakes 30 minutes
Cook Time
20 minutes
Servings Prep Time
12 cupcakes 30 minutes
Cook Time
20 minutes
Carrot Cake Cupcakes
Print Recipe
Servings Prep Time
12 cupcakes 30 minutes
Cook Time
20 minutes
Servings Prep Time
12 cupcakes 30 minutes
Cook Time
20 minutes
Ingredients
Adjust servings: cupcakes
Units:
Instructions
  1. Preheat oven to 350 degrees. In a mixing bowl, whisk together flour, baking soda, baking powder, salt, cinnamon, and nutmeg for 30 seconds, set aside. Shred carrots as directed in notes below, set aside.
  2. In a separate large mixing bowl, whisk together granulated sugar and brown sugar, then add eggs and using an electric hand mixer, blend mixture on low speed 30 seconds, until slightly pale. Mix in applesauce and vanilla extract. With mixer running on low speed, slowly pour in vegetable oil and mix until combined, then mix 20 seconds longer. Mix in half of the dry ingredients, then pour the shredded carrots into the bowl with the remaining flour mixture and toss in flour mixture to coat carrots (they'll clump together a bit but that's fine). Pour carrot mixture into the batter and blend until evenly combined.
  3. Pour batter into paper-lined muffin cups, filling each cup about 3/4 full. Bake in preheated oven until toothpick inserted into center of cupcake comes out clean, about 19 - 21 minutes. Cool in muffin tin several minutes then transfer to a wire rack and cool completely.
Share this Recipe

Strawberry Banana Oatmeal Bites

It’s a great option for making ahead for busy mornings: a) on the weekend to enjoy a couple and freeze the rest b) make the night before.

It’s also a great example of creativity:

  1. Use 1 cup of whole-wheat flour and 1 cup oats instead of 2 cups oats
  2. Substitute another fruit for the strawberries. In the midst of making them one morning I realized someone had eaten all the strawberries, yikes! No worries, I chopped up sliced pineapple I had on hand.
  3. Use frozen strawberries (or other berries).
  4. With or without nuts of any kind. I discovered pistachio and strawberry is a delightful combination!
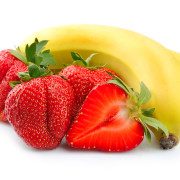
Juicy strawberry with banana
Strawberry Banana Oatmeal Bites
Print Recipe
Servings
18 mini muffins
Servings
18 mini muffins
Juicy strawberry with banana
Strawberry Banana Oatmeal Bites
Print Recipe
Servings
18 mini muffins
Servings
18 mini muffins
Ingredients
Adjust servings: mini muffins
Units:
Instructions
  1. Preheat the oven to 350. Brush 12 cups in a muffin tin with melted butter, coconut oil or extra-virgin olive oil.
  2. Combine the oats, brown sugar, baking powder and salt in a large bowl and stir until thoroughly mixed.
  3. In a separate bowl, whisk together eggs, banana, milk and vanilla.
  4. Add the wet ingredients to the dry ingredients and stir until blended.
  5. Stir in walnut, ground flax seed and strawberries.
  6. Spoon the oatmeal mixture into prepared muffin tin.
  7. Bake uncovered for 22-25 minutes or until oatmeal is lightly browned and a toothpick inserted into the middle comes out clean.
Recipe Notes
Share this Recipe

Making Breakfast Easy

In just a few minutes, make breakfast the night before, and it’s ready in the morning. If you haven’t tried overnight oats before, this is a great recipe to start with. I love Angela Liddon’s website  Oh She Glows;  although I don’t think I will ever be vegan, I’ve made many recipes from her website. Her cookbook is one of only three I have in my kitchen—that’s how much I use it.

There are innumerous recipes for overnight oats. The more I make them, the more concoctions I come up with depending on fresh and frozen fruits (and nuts) I have on hand.

If you don’t like the texture simply skip the chia seeds. Instead sprinkle a tablespoon or two of ground flaxseeds and mix in right before eating.

Overnight Oats
Print Recipe
Servings
1 bowl
Servings
1 bowl
Overnight Oats
Print Recipe
Servings
1 bowl
Servings
1 bowl
Ingredients
Adjust servings: bowl
Units:
Instructions
  1. In a small bowl, mash the banana until almost smooth. Now stir in the chia seeds and cinnamon until combined.
  2. Stir in the oats, almond milk, and vanilla (if using). Cover and refrigerate overnight, or a minimum of 2 hours.
  3. In the morning, stir the oat mixture to combine. If your Vegan Overnight Oats have a runny consistency even after they soak, simply stir in an additional 1 tablespoon chia seeds and place the mixture back in the fridge until it has thickened up. If the oat mixture is too thick, simply add a splash of milk and stir to combine.
Recipe Notes

Source: Oh She Glows

Share this Recipe

Cottage Cheese Pancakes

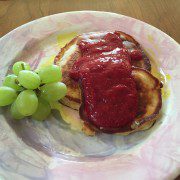
One of my favorite resources for breakfast recipes is Weelicious.com. These pancakes are a huge hit in our house. They are especially yummy with berry puree. I double the recipe and freeze the extras to have on hand during the week. Pop them in the toaster and breakfast is ready in minutes on a busy weekday morning.

For the Berry Puree, simply defrost a package of frozen berries (raspberries, black berries, mixed berries) and puree until smooth. Add 2 tablespoons of orange juice or water to dilute if it is too thick.
Sweeten if desired with 1 – 2 tablespoons maple syrup or honey

Cottage Cheese Pancakes
Print Recipe
Servings
4
Servings
4
Cottage Cheese Pancakes
Print Recipe
Servings
4
Servings
4
Ingredients
Adjust servings:
Units:
Instructions
  1. In a bowl whisk together eggs, cottage cheese, vanilla and honey
  2. In a separate bowl whisk the dry ingredients.
  3. Pour the dry mixture into the wet mixture and stir until just combined.
  4. Heat a large sauté pan or griddle over medium heat, brush with butter or coconut oil. Pour a spoonful of batter at a time. When begin to bubble, flip them over.
  5. Cook for 2 minutes on each side or until pancakes are set and golden.
  6. Serve with maple syrup of berry sauce on top.
Recipe Notes
Share this Recipe

Sweet Potato and Zucchini Bread

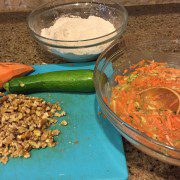
This is quite popular in our house—either as muffins or a loaf of bread. I make a double recipe to freeze some for week days. Before freezing the bread loaf, I slice it and place pieces of parchment paper between the slices; making it easy to pull out a frozen slice and pop into the toaster.

Sweet potatoes pack a powerful nutritional punch. They have over 400% of your daily needs for vitamin A in one medium spud, as well as loads of fiber and potassium. More about sweet potatoes here.

I also like the high fiber content in these muffins (slices); high fiber breakfasts help promote regularity for a healthy digestive tract.

Sweet Potato and Zucchini Bread
Print Recipe
To make muffins instead of a loaf,  brush the muffin tin with softened butter, coconut oil or expeller-pressed canola oil. Bake 25 - 30 minutes or until cake tester comes out clean.
Sweet Potato and Zucchini Bread
Print Recipe
To make muffins instead of a loaf,  brush the muffin tin with softened butter, coconut oil or expeller-pressed canola oil. Bake 25 - 30 minutes or until cake tester comes out clean.
Ingredients
Adjust servings:
Units:
Instructions
  1. Preheat oven to 350°F.
  2. Butter and flour 9x5x3-inch loaf pan.
  3. Sift first 5 ingredients into medium bowl.
  4. Beat sugar, oil, eggs and vanilla in another, larger, bowl until blended. Mix in zucchini and sweet potato.
  5. Add dry ingredients and walnuts and stir well.
  6. Transfer batter to prepared pan. Bake until tester inserted into center comes out clean, about 1 hour 20 minutes.
  7. Cool bread in pan on rack 15 minutes. Cut around bread to loosen. Turn out onto rack and cool completely.
Share this Recipe